Connect Zoho
Create a Zoho API client and connect it to Zync with OAuth.
Zync connects to Zoho with an API client that you create in your own Zoho account. You stay in control: you can revoke the client in Zoho at any time.
In the app
The Connection page has a Setup Help button with a short version of these steps.
Before you start
You need:
- A Zoho Books or Zoho Inventory organisation, and a Zoho user who can create API clients.
- Your Zoho region. Look at the address bar when you are signed in to Zoho:
zoho.inis India,zoho.comis the US,zoho.euis Europe,zoho.com.auis Australia andzoho.jpis Japan.
Region domains
Use the row for your region everywhere on this page. A client created in one region does not work with the domains of another.
| Region | API Console | Accounts Domain | API Domain |
|---|---|---|---|
| India | https://api-console.zoho.in | https://accounts.zoho.in | https://www.zohoapis.in |
| United States | https://api-console.zoho.com | https://accounts.zoho.com | https://www.zohoapis.com |
| Europe | https://api-console.zoho.eu | https://accounts.zoho.eu | https://www.zohoapis.eu |
| Australia | https://api-console.zoho.com.au | https://accounts.zoho.com.au | https://www.zohoapis.com.au |
| Japan | https://api-console.zoho.jp | https://accounts.zoho.jp | https://www.zohoapis.jp |
Step 1: Create the API client
-
Open the Zoho API Console for your region and sign in.
-
Click Add Client (or GET STARTED the first time).
-
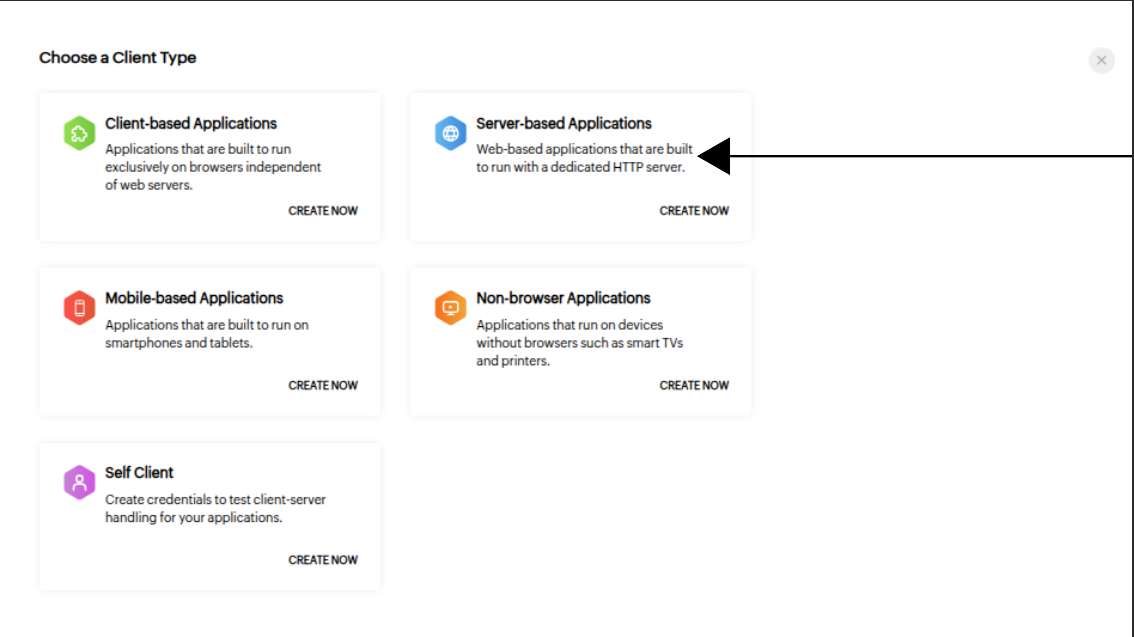
Choose Server-based Applications.
-
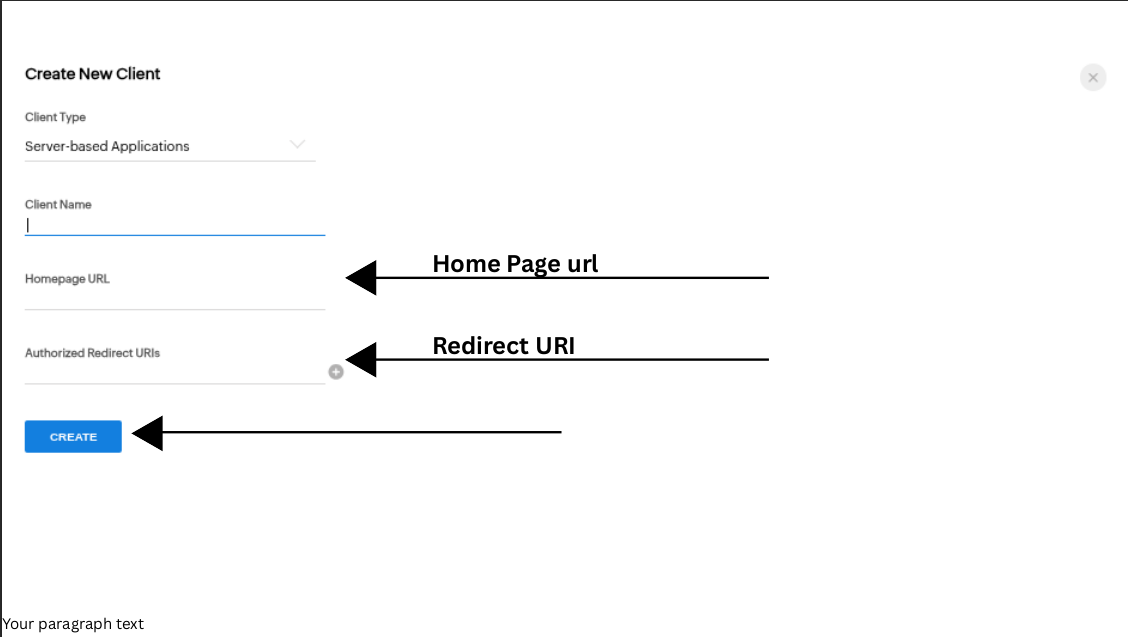
Fill in the form:
- Client Name: anything you will recognise, for example
Shopify Sync. - Homepage URL:
https://zohosync.vercel.app - Authorized Redirect URIs: the redirect URI shown under Step 2: Connect to Zoho on the app's Connection page. Use the Copy button there.
- Client Name: anything you will recognise, for example
-
Click CREATE.
-
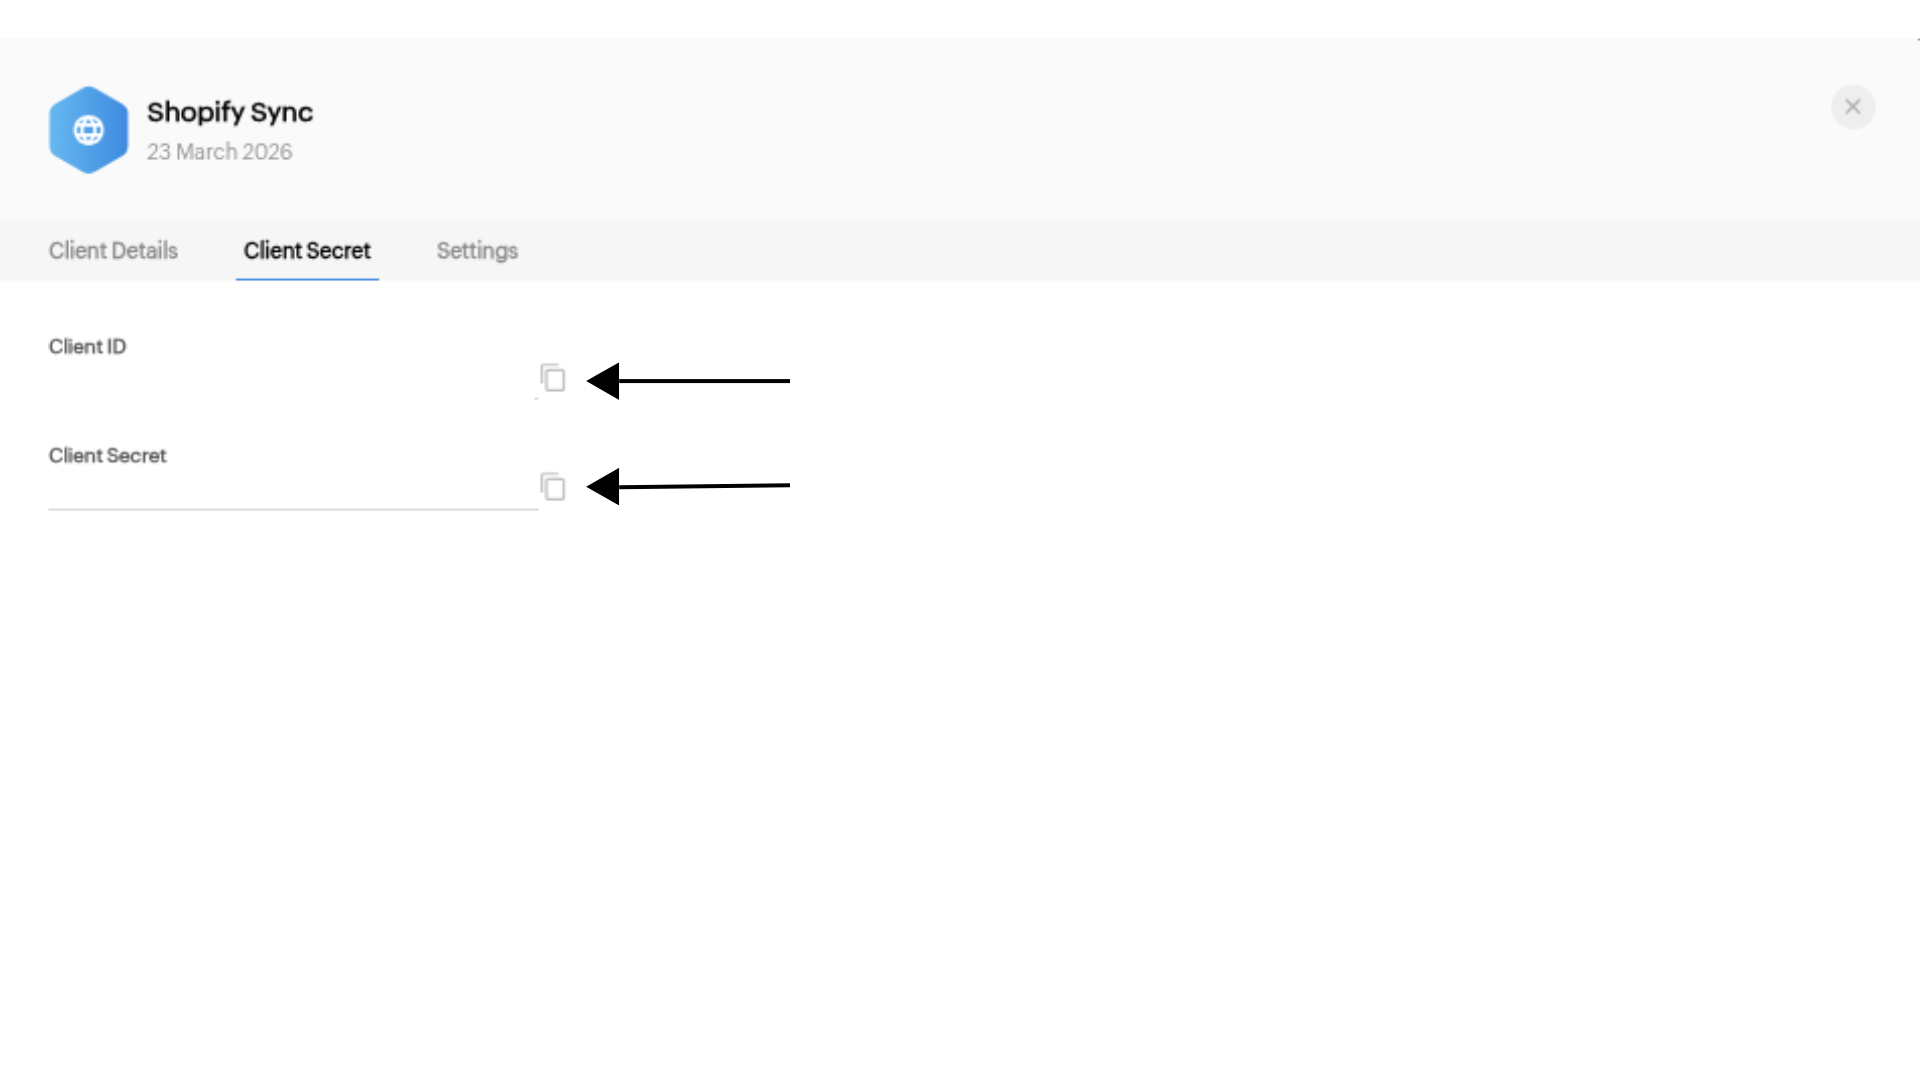
Open the Client Secret tab and copy the Client ID and the Client Secret.
Step 2: Enter the credentials
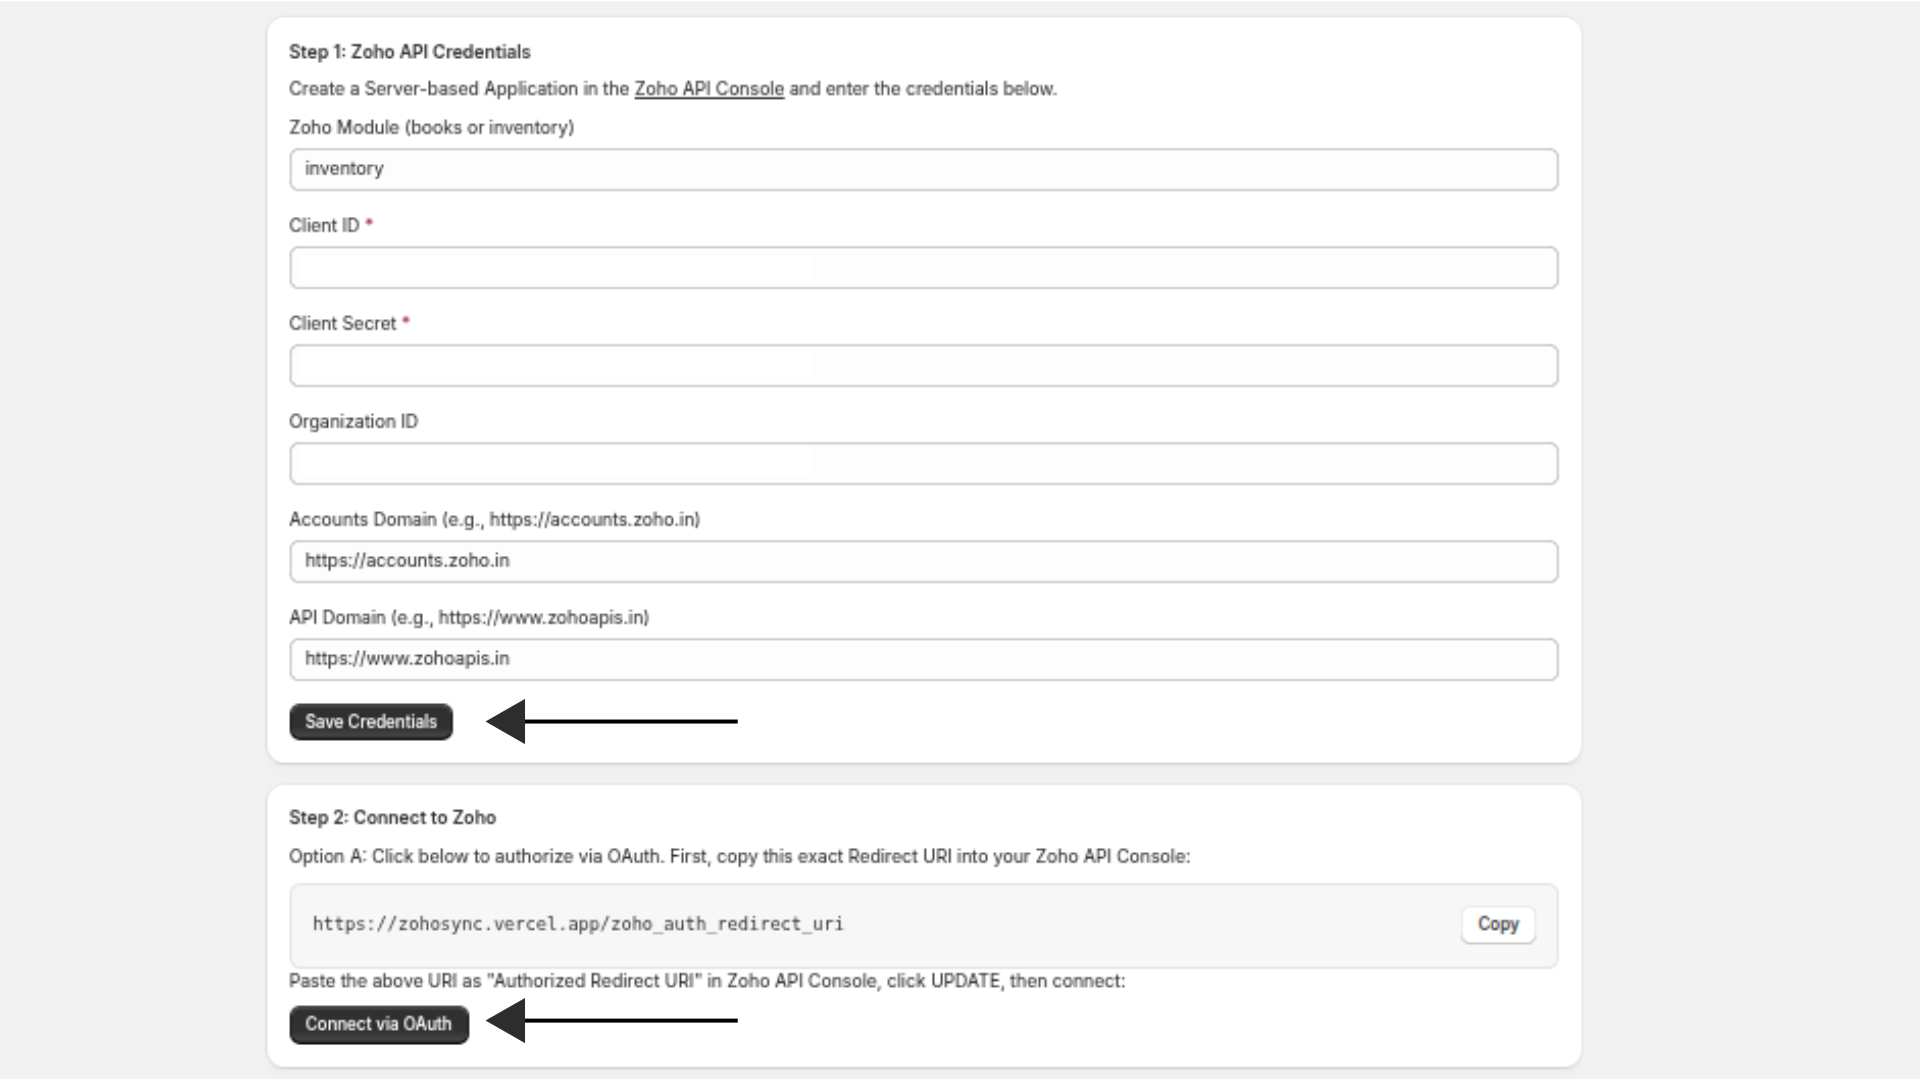
In Zync, open Connection. Under Step 1: Zoho API Credentials fill in:
| Field | What to enter |
|---|---|
| Zoho Module | books for Zoho Books, inventory for Zoho Inventory |
| Client ID | From the Zoho API Console |
| Client Secret | From the Zoho API Console |
| Organization ID | Leave empty to use your default organisation. Enter an ID only when you have several organisations and want one that is not the default |
| Accounts Domain | From the table above |
| API Domain | From the table above |
Click Save Credentials.
Finding an organisation ID
In Zoho Books or Zoho Inventory, click your organisation name at the top right and choose Manage Organizations. The ID is listed beside each organisation.
Step 3: Authorise with OAuth
- Check that the redirect URI in the Zoho API Console is exactly the one the app shows. If you change it in Zoho, click UPDATE.
- In Zync, click Connect via OAuth. A Zoho window opens.
- Sign in if asked, review the access request and click Accept.
- The window closes and the Connection page reloads.
You now see Connected to Zoho with a green Connected badge, the module you chose and the organisation ID.

Zync asks for full access to Zoho Books and Zoho Inventory, because it creates and updates items, contacts, sales orders, invoices, payments and credit notes on your behalf.
Check or end the connection
| Button | What it does |
|---|---|
| Test Connection | Refreshes the Zoho token and confirms that Zoho accepts it |
| Disconnect | Removes the stored tokens and stops listening for Shopify events. Your settings and the links on your records are kept, so you can connect again later |
Changing module, region or organisation
Click Disconnect, change the credentials under Step 1, save, then connect again.
Changing organisation after you have synced
The Zoho IDs saved on your Shopify products, customers and orders belong to the organisation you synced with. If you connect a different organisation, those links point at records that do not exist there. Talk to support before you switch a store that has already synced.